Foliage – Creating Leaves and Flowers in Photoshop – Page 1 of 2
I've used leaves, flowers, vines, and other natural elements in my designs and templates for some time now. This tutorial goes through the steps of creating some basic natural elements as the basis for a web page layout.

1 – Creating a Flower
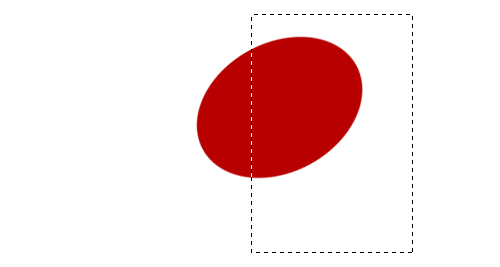
The objective of this step is to rotate and cut the edge off an ellipse, to make half a petal shape.
 Create a new layer.
 Use the Elliptical Selection Tool to select an elliptical area.
 Choose a darkish red colour, and fill the area with the Paint Bucket Tool.
Press Ctrl+D to remove the selection.
Press Ctrl+T to transform your shape. Drag a corner around, to rotate your shape, until it's in a position similar to the one shown in the diagram.
 With the Selection Tool, select a large part of your shape that you wish to cut off, so that the remaining part of your shape resembles half a petal. Go back and rotate your shape if you need to.

2 – Creating a Whole Petal
Right-click on your petal layer in the Layers list. It should be called "Layer 1".
Click Duplicate Layer.
Click Edit > Transform > Flip Horizontal.
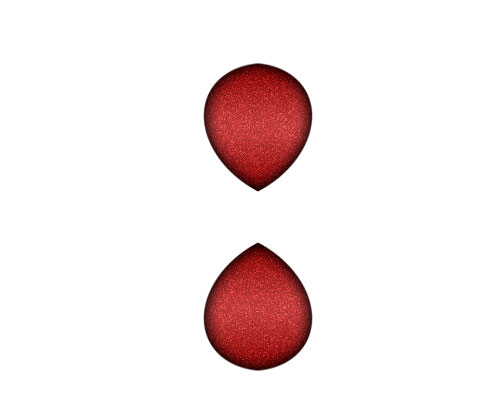
 Choose the Move Tool, and use the arrow keys to nudge the two half-petals around until they join to make a whole petal. Note: pressing Shift and an arrow key nudges the object around by 10 pixels at a time, instead of 1.
Click on the "Layer 2" layer in the Layers list. This should be your new, rotated half of the petal. Press Ctrl+E to merge this layer down, so that the petal is all on one layer.

3 – Adding Texture and Lighting to the Petal
Click Filter > Noise > Add Noise. Set it to around 10%, Gaussian, Monochromatic.
Set your colours back to black and white, then switch the colours, by using the little icon, or pressing "D".
In the Layers list, right-click this layer and choose Blending Options. Click Gradient Overlay. Set the Opacity to 25%, but leave the Mode as Normal. Set the Angle to 90° and change the Style to Reflected. Press OK.
Ctrl+Click this layer in the Layers list to select its area.
 Choose the Brush Tool. Click the drop-down box and choose the size 35 blurry brush. Set the brush's Opacity to 20%. Apply the brush around the outside of the petal, to create a shadowy area, as shown.
Press Ctrl+D to deselect.

4 – Duplicating the Petal
Right-click the petal in the Layers list, and click Duplicate Layer.
Click Edit > Transform > Flip Vertical.
 Choose the Move Tool, and press Shift+Up Arrow until the petals are arranged as shown in the diagram. You can drag the petal around with the mouse if you like, but remember to hold the Shift key, so the petal moves exactly vertically.

5 – Creating One Set of Petals
In the Layers list, click the eyeball next to your Background layer. This will make it disappear.
Click Layer > Merge Visible. If you try to merge the layers any other way, you'll have two sets of Blending Options (Effects) on one of the petals. That would be bad. :)
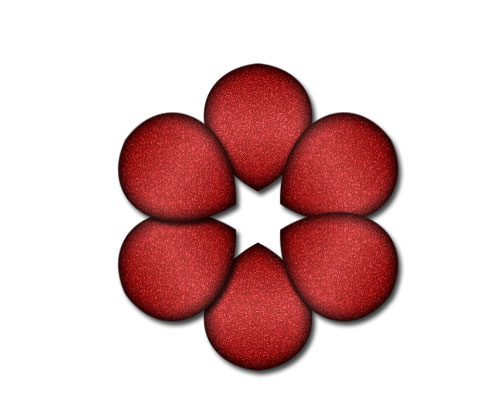
Right-click your layer in the Layers list, and click Duplicate. Press Ctrl+T to Transform your layer. Drag the corner around, but hold Shift, so it rotates in even increments. Duplicate your layer, and rotate it again. You should end up with six evenly-spaced petals, as shown in the diagram.
Click Layer > Merge Visible.
Right-click this layer in the Layers list. Give it a Drop Shadow, and press OK.
Click the eyeball next to your Background layer, to make it appear again.


