


Making a Circuit Board Website Layout in Photoshop – Page 4 of 4
This page of the tutorial shows how to put the pieces together, and slice the image for placement into a website.
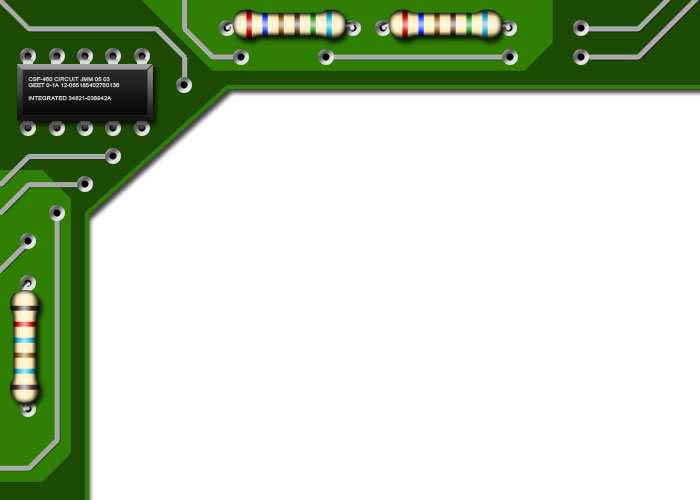
8 – Putting everything together, and adding tracks
 Hold down Alt, while using the Move Tool, to make more copies of the "hole" you created earlier. (You might also want to put them all into a new Layer Set.) Use the grid to arrange the holes, and make appropriate places for your components to go.
Resize your integrated circuit, by clicking on its layer set, in the Layers window, and pressing Ctrl+T. (Remember to hold Shift while doing so.) Repeat this process for your resistor.
Right-click your resistor layer set, and duplicate it. You can edit the colours of the bands on the new one if you like. (If you rotate it, you'll need to go into the Blending Options, and change the angle of the Gradient Overlay too. The Gradient Overlay won't automatically rotate when the layer is rotated.)
Drag the various pieces into place.
 Create a new layer.
 With the grid and snapping turned on, use the Line Tool to draw a network of tracks on your website design. (I used colour #A8A8A8 here.)
Add some Blending Options to this layer.
- Drop Shadow (Blend Mode: Normal. Opacity: 100%. Distance: 1px. Size: 1px.)
- Stroke (Size: 1px. Color: #B2B2B2.)
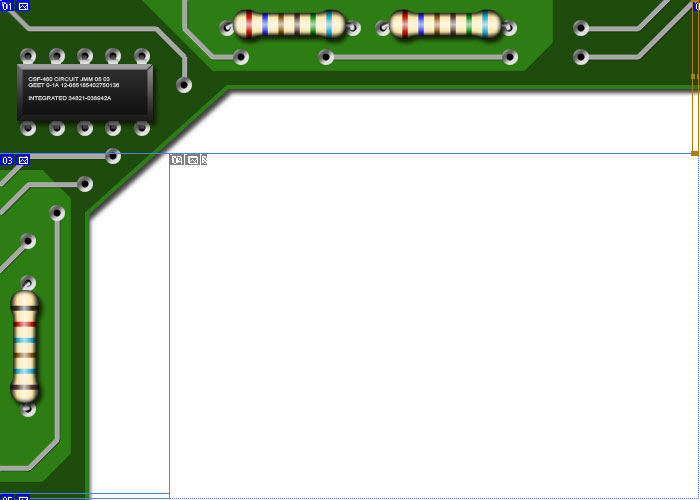
9 – Slicing up the web page layout
 Use the Slice Tool to slice the image up as shown. The little slices at the top right and bottom left should be one pixel wide. I've made them wider here, just so that you can see them. You may need to zoom right in for this.
Click File > Save for Web and Devices. This will now save each slice as a separate image.
If you know how to use CSS, then you already know how to turn these images into a web page.
Otherwise, in your web page editor, make a table with one cell, and a width of 100%. Put the header image (01) into it, and set the one-pixel-wide "sliver" image as its background.
Underneath that table, make another table, but with two cells, next to each other. In the left cell, put in image 03, and set the sliver (05) as the cell's background.
