


Beginners' Guide to Adobe Photoshop – Page 4 of 4
Blending Options & Special Effects
10 – Adding Effects
Now that you know the basics, it's time to start adding some easy special effects.
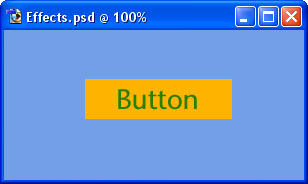
To demonstrate Adobe Photoshop's special effects, here's an unembellished button for a website.
Each part of this image is on a separate layer.
11 – Key Adobe Photoshop Blending Options
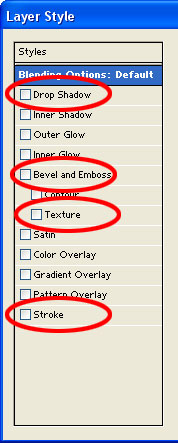
In the Layers list, right-click on a layer, and select Blending Options.
This is a picture of the left-hand portion of the Blending Options window that will appear. (This image is from an older version of Photoshop, but it looks very similar in newer versions.)
Drop Shadow - Selecting this option will make your layer cast a shadow on layers below it.
Bevel and Emboss - Makes the layer like a block of gold bullion - raised in the centre, with edges that slope down. (This is a good effect for creating buttons.)
Texture - Makes the surface of the layer look like it's made of wood, stone etc. Use the "Overlay" setting.
Stroke - Stroke is just another word for "outline". A Stroke is useful to make an object stand out from its background.
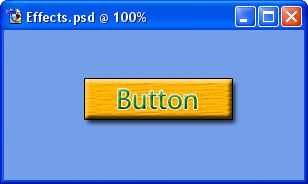
12 – The end result
Other than using some of the Blending Options, nothing else has been done to this button.
It's really that easy.
A final few Adobe Photoshop features
Zoom: Press (Ctrl and +) to zoom in. Press (Ctrl and -) to zoom out. This is very useful if you're a bit of a pixel pirate :)
Transformation: To Transform (resize/rotate/distort) an object, press Ctrl+T. To Transform a selection, click Select > Transform Selection. Use the Shift key while transforming to stop the image distorting.
"Special Message"
I hope this tutorial has helped you get the idea of Adobe Photoshop. You can now face the "wall of random icons and palettes" with confidence. :)
Happy Photoshopping!
