


Table Top – A website that looks like your desk – Page 1 of 2
The first page of this tutorial deals with making the wood surface, and the paper with writing on it.
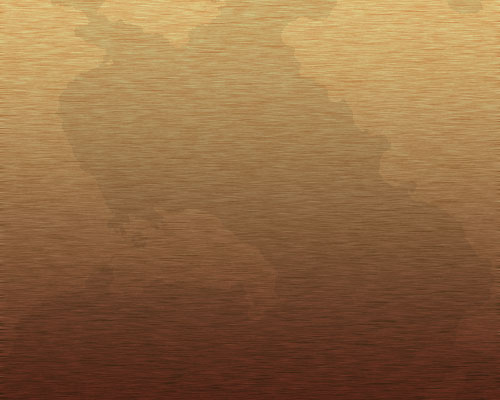
1 – A Stained Wood Surface
Create a new image in Photoshop. I recommend making it 700 pixels wide, by 600 tall. Much bigger than that, and it will take too long to load.
 Create a new layer.
 Fill the area with a dark orange colour.
Click Filter > Noise > Add Noise. Choose Gaussian, and set the Amount to about 6.
Click Filter > Blur > Motion Blur. Set the Angle to 0°, and the Distance to 10.
If the colour isn't quite right, press Ctrl+U to bring up the Hue/Saturation Properties.
Right-click this layer in the Layers window, and choose Blending Options. Click on Gradient Overlay. Change the Blend Mode to Overlay, and set the Opacity to around 65%. Choose the black-white gradient from the drop-down box, if it isn't already selected.
Create a new layer.
Change this layer's Mode from Normal to Overlay.
Make sure your foreground and background colours are black and white. Click Filter > Render > Clouds.
Click Image > Adjustments > Brightness/Contrast. Set the Contrast to maximum.
If you don't like your clouds, you can drag the layer into the bin, and try again.
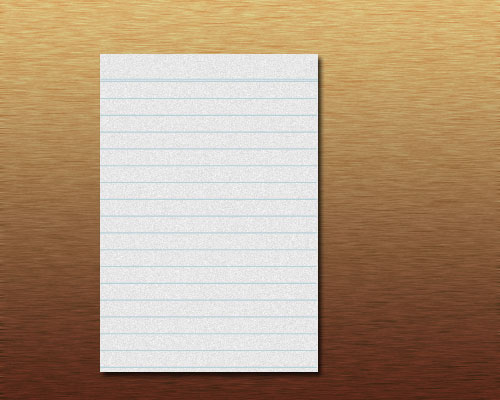
2 – A piece of note paper
Create a new layer.
 Select a rectangular area.
Fill the area with a very slightly off-white colour.
Click Filter > Noise > Add Noise. Set the Amount to about 3.
Press Ctrl+D to deselect.
 Choose a light blue colour. Use the Text Tool to type in a row of equal signs (=), then press enter, and type in rows of dashes. On the Character Palette, reduce your Tracking to a negative number if there are spaces between your dashes. (Click Window > Character if you can't see the Character Palette.)
Right-click your note paper layer in the Layers Palette, and choose Blending Options. Click on Drop Shadow, and change its Distance to 3 pixels.
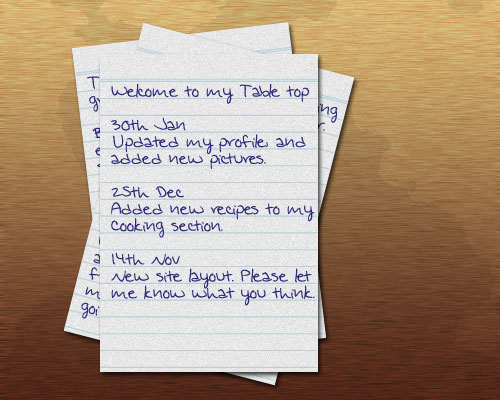
3 – Adding text and more paper
Download a handwriting font from somewhere, or use the one that I've used. (Copy it to your WINDOWS\Fonts folder. Go to that folder with Windows Explorer, and click File > Install New Font.)
Choose a dark blue colour, and type in some appropriate text. Change the font size to match the blue lines on your paper. Change the Leading (the line height) in the Character Palette, so that the text sits on the blue lines.
 At the bottom of the Layers Window, click the New Group icon. Drag your white paper layer, your blue lines layer, and your text layer into the little folder you've just created. Right-click this layer set, and Duplicate it a few times.
Click on each layer set, and rotate it a bit, by pressing Ctrl+T.
Change the visible text of the lower pieces of paper.
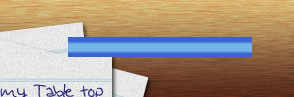

4 – Making a Pencil
Create a new layer.
Select a long, rectangular area.
Fill the area with a colour. I've used blue here.
Right-click your layer in the Layers Palette, and choose Blending Options. Change the Blend Mode to Overlay, and set the Opacity to 35%. Change the Style to Reflected (this makes your gradient a mirror image). Tick Reverse, and click on the gradient to edit it. Drag the tabs around until they look like the diagram above. This will cause the dark-light-dark bands that give it the appearance of a normal hexagonal pencil.
