


Random Lighting in Adobe Photoshop
On the web, most things that aren't photographs, are two-dimensional, monotone areas, devoid of lighting.
The key to making websites that really stand out has to do with two factors - lighting and randomness.
This tutorial goes through the steps of making a very funky piece of wallpaper. The main focus of this tutorial is on the random lighting aspect, based on Adobe Photoshop's "Clouds" tool, but I'll also go into creating what I call a layer of "Canopy Lighting", by using a Noise Gradient. (Noise Gradient is only present in Photoshop 6.0 and later versions.)
1 – Creating some wavy patches
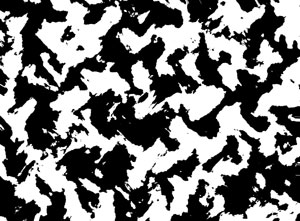
Make a new image, 6000 pixels wide and 4500 pixels high. With the default black and white selected, click Filter > Render > Clouds. Clouds are an excellent way to create randomness.
Turn the clouds into coloured patches, by clicking Image > Adjust > Brightness/Contrast. Set the Contrast to +100. You can also alter the size of the patches by changing the Brightness.
 Zoom out (Press Ctrl -) and select about a quarter of the image (you can do it precisely if you like).
Click Image > Crop. (The image was made bigger to make the clouds smaller.)
Click Filter > Distort > Wave. Increase the wavelength to Minimum 200, Maximum 300, and increase the maximum amplitude to 50. Randomise the waves until you've got a nice effect, and click OK.
2 – Making a Noise Gradient
 Create a new layer.
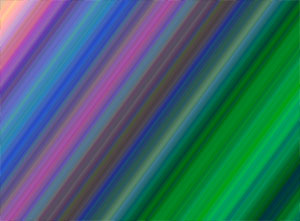
 Choose the gradient tool. Click on the coloured representation of the gradient. Choose Noise Gradient. Apply the gradient across the image.
3 – Canopy Lighting
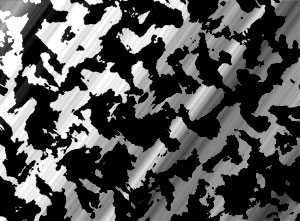
Desaturate the layer, by pressing Ctrl+Shift+U. The colours of a Noise Gradient aren't useful here, but it's a good source of randomised lighting when desaturated.
Change it from "Normal" to a Linear Light layer (Adobe Photoshop 7.0.)
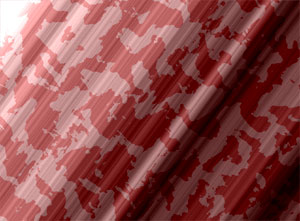
This noise gradient layer creates what I call "Canopy Lighting" - visible, unidirectional lighting, with a myriad of different intensities - as if it had gone through the randomising effect of a forest canopy.
The problem with this lighting layer is that it doesn't show up over the black areas.
4 – Adjusting the light
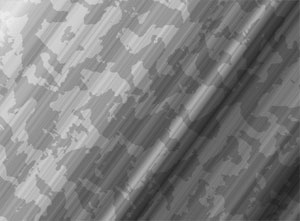
To make the light visible everywhere, select the cloudy background layer and click Image > Adjustments > Brightness/Contrast. Reduce the contrast to -75%. (This makes the white a light grey, and the black a dark grey, so they'll both be affected more by the Canopy Lighting layer.)
If you do this tutorial again, instead of changing the contrast, just increase the layer's lightness by about 40.
5 – Adding some colour
Go to your background layer and alter its Hue/Saturation, by pressing Ctrl+U. Tick "Colorize". Play with the Lightness and Saturation, and select a Hue (colour).
I've used this canopy lighting effect for a number of sites I've made. It also makes a very nice wallpaper.
Click on the link for a full screen version. To set it as your wallpaper, just right-click it. Wallpaper
